
Showing posts with label bead stitching. Show all posts
Showing posts with label bead stitching. Show all posts
Monday, November 8, 2010
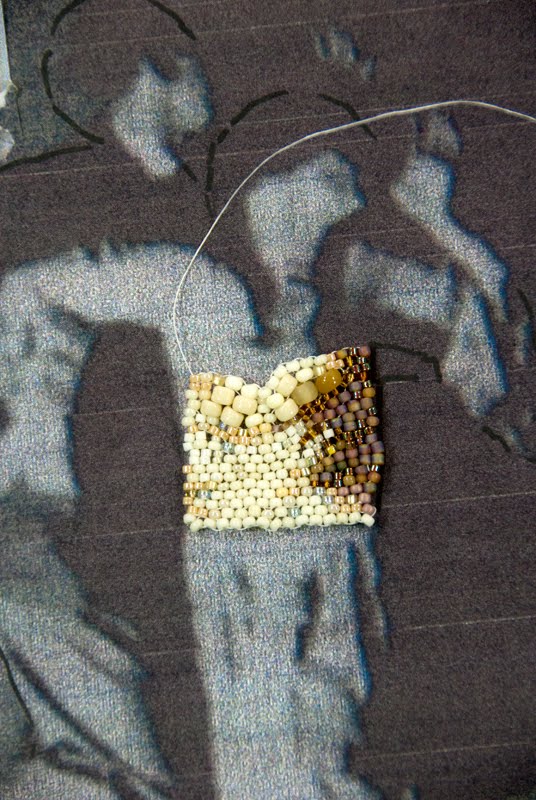
Fall Work by Joanne

Tuesday, January 26, 2010
FGP#24 Finished 6 of Clubs "Clubbing the Night Away"


I can't wait to see the whole deck where each card is interpreted by a different fiber artist. Joanne
Thursday, January 21, 2010
FGP#23 Dance Floor continued
I am continuing to work the dance floor in brick stitch outlines with right angle weave filler. The brick stitching is sometimes tapered. It helps to have multiple sizes of the same or similar bead. Working down to the deadline now. The photography for the deck of cards is commencing. I will post here where the cards may be ordered and when the exhibit of all the deck pieces will be when I get the information. Joanne


Tuesday, December 29, 2009
FGP#18 Frame continued
Well, Back from a holiday break. We went to visit the granddaughter in Rochester, NY. I did take 2 days off before Christmas to sew a snow white dress.
But now back to the project: First, I photographed the figures on black and gray backgrounds to decide which I liked better. For all but the disco balls, I preferred the gray.


I stitched 2 rows of round #6 seed beads in black and very dark brown around the entire wire frame. I like the depth that close but not identical shades provide. I decided to up the weight of the thread to 10 lb fireline as the bead holes allowed it and I figured, the heavier the better.

After the 2 rows of round beads, I added a row of dark iridescent rectangular beads, followed by a row of bluish gray rectangular beads. I think that the rectangular beads will add rigidity to the frame and the gray will help shade the frame into the proposed gray background. As I bead around, I attach any figure that butts the frame.

I have decided to leave the upper left corner to last. This is where I planned the speakeasy door with the eye hole. I am debating leaving this feature out as I am concerned with getting the background too busy as well as adding a detail too small (the eye in the hole) to carry down to the reduced playing card size.

Another decision is what stitch in which to actually do the background. Brick stitch will be more stiff but add lines to the background. I like to surround my brick stitch figures in a background of right angle weave as there are no distracting line of beads in right angle weave. However, right angle weave is a softer stitch, it will not be as stiff a supporting structure. Right angle weave also takes longer to stitch than brick stitch. I have chosen to do the lines of the dance floor in brick stitch and the surrounding background in right angle weave. I think that the dance floor lines will add sufficient support especially if done with rectangle beads.
I am sampling some of the brick stitch lines representing the dance floor. I may or may not decide to keep these. I do like the blue and gray, but like the gold-brassy beads less. I am concerned they might draw attention too much away from the figures. I will wait and delay my decision till more is stitched.

I have decided to do the background in right angle weave. To prepare the brick stitching for right angle weave, I do a picot row. I add a bead, pick up the thread bridge between the 2 beads below and DO NOT go through the bead a second time. This allows the bead to set up with its hole perpendicular to the previous beads below in the brick stitch row. These picot beads will be incorporated into the 4 bead circles that are the basic unit of right angle weave. Joanne

But now back to the project: First, I photographed the figures on black and gray backgrounds to decide which I liked better. For all but the disco balls, I preferred the gray.


I stitched 2 rows of round #6 seed beads in black and very dark brown around the entire wire frame. I like the depth that close but not identical shades provide. I decided to up the weight of the thread to 10 lb fireline as the bead holes allowed it and I figured, the heavier the better.

After the 2 rows of round beads, I added a row of dark iridescent rectangular beads, followed by a row of bluish gray rectangular beads. I think that the rectangular beads will add rigidity to the frame and the gray will help shade the frame into the proposed gray background. As I bead around, I attach any figure that butts the frame.

I have decided to leave the upper left corner to last. This is where I planned the speakeasy door with the eye hole. I am debating leaving this feature out as I am concerned with getting the background too busy as well as adding a detail too small (the eye in the hole) to carry down to the reduced playing card size.

Another decision is what stitch in which to actually do the background. Brick stitch will be more stiff but add lines to the background. I like to surround my brick stitch figures in a background of right angle weave as there are no distracting line of beads in right angle weave. However, right angle weave is a softer stitch, it will not be as stiff a supporting structure. Right angle weave also takes longer to stitch than brick stitch. I have chosen to do the lines of the dance floor in brick stitch and the surrounding background in right angle weave. I think that the dance floor lines will add sufficient support especially if done with rectangle beads.
I am sampling some of the brick stitch lines representing the dance floor. I may or may not decide to keep these. I do like the blue and gray, but like the gold-brassy beads less. I am concerned they might draw attention too much away from the figures. I will wait and delay my decision till more is stitched.

I have decided to do the background in right angle weave. To prepare the brick stitching for right angle weave, I do a picot row. I add a bead, pick up the thread bridge between the 2 beads below and DO NOT go through the bead a second time. This allows the bead to set up with its hole perpendicular to the previous beads below in the brick stitch row. These picot beads will be incorporated into the 4 bead circles that are the basic unit of right angle weave. Joanne

Sunday, November 29, 2009
FGP#10 Female Flapper
This will be a short post. I began the flapper at the hipline of the dress and worked upwards into the bust and torso, shaping mainly by progressing from one bead brick stitch to brick stitch made up of two (or 3) stacked beads. The change is gradual--going from one regular bead to one larger bead to two small beads to one small, one regular bead to two regular beads, etc.
When I got to the top of the torso and started to add bead ladders laterally for the outstretched arms, I worried that the darks would not match the darks of her partner. Woking in color from a black and white photo has its limitations. I felt that I should stop and finish the bottom of the flapper, move on to her partner and then blend in the darks of both figures at the same time.
I started the dress skirt by throwing a vertical bead ladder down from the low waist. I had wanted to repeat the blue 0n blue stripe that I had used in the swing bodice and the disco vest. However, as I progressed on with the skirt, I felt that the striping was too static and did not reflect the swing of a flapper dress. Sooo--I cut it off and started again with a skirt matching the dress top. Again, throwing a vertical bead ladder to start. However, I went back and marked the photo with curving lines to follow and did some increasing and decreasing on the second row to avoid the straight static striped look. I am much more optimistic with this second skirt.
I often place a bead, check the piece against the photo and remove the bead, selecting another of differing color, shape or size. It is a bigger decision to remove a whole area, BUT if the final effect demands it--DO IT.
Also, never underestimate the help that drawing lines to follow on the photo provides. It really does keep you following the small changes in direction that can easily get out of hand.
Another point: If a particular area of beadwork is found to be too narrow, turn it on its side. See the up and down beads reminiscent of peyote stitch? Just peyote across these to add width.
If the piece is found to be too wide as I decided here in the waist area, cut off the last bead(s) of each row and reinforce the new edge beads with additional thread (change to a smaller needle if necessary). Here I am not worried about little pieces of thread sticking out the side as I will cover them up when I add the background. If this were to be a final edge, I would carefully burn these threads to a lump one at a time with a cigarette lighter so that they would not work out of the beadwork. Joanne


When I got to the top of the torso and started to add bead ladders laterally for the outstretched arms, I worried that the darks would not match the darks of her partner. Woking in color from a black and white photo has its limitations. I felt that I should stop and finish the bottom of the flapper, move on to her partner and then blend in the darks of both figures at the same time.
I started the dress skirt by throwing a vertical bead ladder down from the low waist. I had wanted to repeat the blue 0n blue stripe that I had used in the swing bodice and the disco vest. However, as I progressed on with the skirt, I felt that the striping was too static and did not reflect the swing of a flapper dress. Sooo--I cut it off and started again with a skirt matching the dress top. Again, throwing a vertical bead ladder to start. However, I went back and marked the photo with curving lines to follow and did some increasing and decreasing on the second row to avoid the straight static striped look. I am much more optimistic with this second skirt.
I often place a bead, check the piece against the photo and remove the bead, selecting another of differing color, shape or size. It is a bigger decision to remove a whole area, BUT if the final effect demands it--DO IT.
Also, never underestimate the help that drawing lines to follow on the photo provides. It really does keep you following the small changes in direction that can easily get out of hand.
Another point: If a particular area of beadwork is found to be too narrow, turn it on its side. See the up and down beads reminiscent of peyote stitch? Just peyote across these to add width.
If the piece is found to be too wide as I decided here in the waist area, cut off the last bead(s) of each row and reinforce the new edge beads with additional thread (change to a smaller needle if necessary). Here I am not worried about little pieces of thread sticking out the side as I will cover them up when I add the background. If this were to be a final edge, I would carefully burn these threads to a lump one at a time with a cigarette lighter so that they would not work out of the beadwork. Joanne




Subscribe to:
Posts (Atom)

