Sunday, November 29, 2009

FGP#10 Female Flapper

This will be a short post. I began the flapper at the hipline of the dress and worked upwards into the bust and torso, shaping mainly by progressing from one bead brick stitch to brick stitch made up of two (or 3) stacked beads. The change is gradual--going from one regular bead to one larger bead to two small beads to one small, one regular bead to two regular beads, etc.

When I got to the top of the torso and started to add bead ladders laterally for the outstretched arms, I worried that the darks would not match the darks of her partner. Woking in color from a black and white photo has its limitations. I felt that I should stop and finish the bottom of the flapper, move on to her partner and then blend in the darks of both figures at the same time.

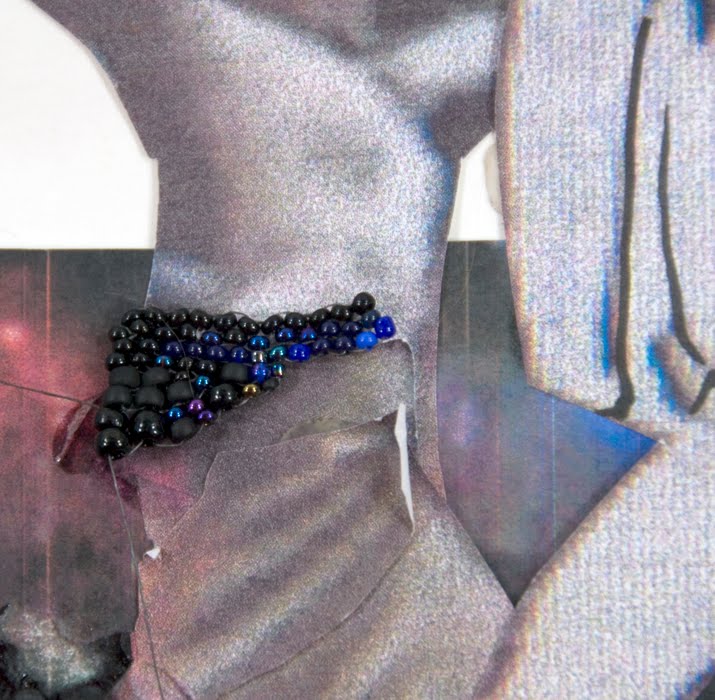
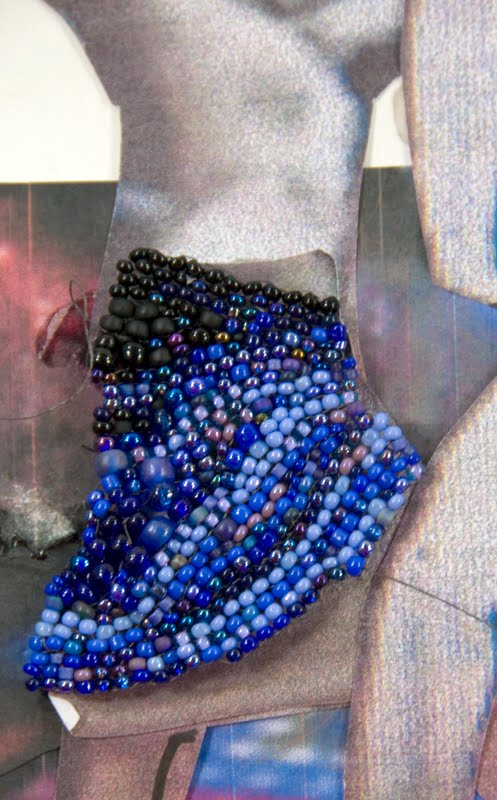
I started the dress skirt by throwing a vertical bead ladder down from the low waist. I had wanted to repeat the blue 0n blue stripe that I had used in the swing bodice and the disco vest. However, as I progressed on with the skirt, I felt that the striping was too static and did not reflect the swing of a flapper dress. Sooo--I cut it off and started again with a skirt matching the dress top. Again, throwing a vertical bead ladder to start. However, I went back and marked the photo with curving lines to follow and did some increasing and decreasing on the second row to avoid the straight static striped look. I am much more optimistic with this second skirt.

I often place a bead, check the piece against the photo and remove the bead, selecting another of differing color, shape or size. It is a bigger decision to remove a whole area, BUT if the final effect demands it--DO IT.

Also, never underestimate the help that drawing lines to follow on the photo provides. It really does keep you following the small changes in direction that can easily get out of hand.

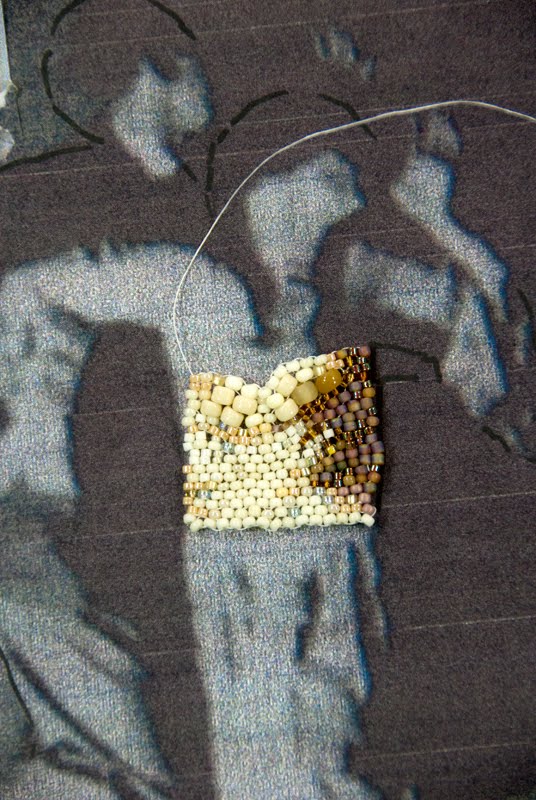
Another point: If a particular area of beadwork is found to be too narrow, turn it on its side. See the up and down beads reminiscent of peyote stitch? Just peyote across these to add width.

If the piece is found to be too wide as I decided here in the waist area, cut off the last bead(s) of each row and reinforce the new edge beads with additional thread (change to a smaller needle if necessary). Here I am not worried about little pieces of thread sticking out the side as I will cover them up when I add the background. If this were to be a final edge, I would carefully burn these threads to a lump one at a time with a cigarette lighter so that they would not work out of the beadwork. Joanne


Thursday, November 26, 2009

FGP#9 Female Disco Dancer

Turkey Day but I got up early. Luckily I have a husband who does the holiday dinners. So while he is preparing the turkey, I can be over in my back yard studio finishing up and posting Ms Disco.

First is to pick a place to begin. I chose the waist. Note that I am ignoring the colors of the photo and doing all of my dancers in the same color range as the first pair. Ms Disco poses an additional problem as the photo I am working from is particularly bad (I photographed UTube video clip dancers off my computer screen and then pasted different dancers together to get the pose and costume that I wanted).

In working the skirt, I exaggerated the creases in the skirt by stitching short rows to emphasize movement. When the skirt was at an appropriate place, I joined it to Mr. Disco's leg. Ms Disco's legs were done in the same manner previously describes in past posts. And off course she needs platform shoes.

When the lower body was finished, I went back to the waist and worked the torso upwards, extending bead ladders for the arms. Shading the bead colors and sizes provides roundness to the body and bust.

Hair and face were last. Due to the small size of the face area and the resolution limit of the bead size, face detail needs to be kept to a minimum. Now its time to go enjoy family and dinner. Joanne


Monday, November 23, 2009

FGP#8 Male Disco Dancer

OK--to procede on with Mr. Disco Dancer, I began at the waist, changing the direction of the brick stitch by adding a bead and inserting into the thread between 2 beads and then going back through the new bead.
After a few rows, I began the right leg by extending a bead ladder. It just doesn't work to make the bead ladder the entire leg length. I do 1"-2" at a time, then stabilize by adding a second and row. A third row takes me back to where I can then extend the bead ladder further down the leg. Repeat till the correct leg length is achieved.

Since the right leg needs to connect into the crotch, I switched to the left leg. When the left leg and crotch areas were completed, I returned and finished the right leg. Note that shading the white leisure suit takes a large selection of cream and tan colored beads in sizes from 15 to 6. Smaller beads are needed for tapering. Larger beads are used for shaping and to emphasize rounded areas such as the knee and butt.


Switching to black thread, the feet were added on with a direction change in the brick stitch rows. Note that I also shape by stacking beads 2 and even 3 beads high in a single brick stitch row.  Joanne

Tuesday, November 17, 2009

FGP#7


I've just had a vacation break cruising down the Saone and Rhone from Lyon to Avignon. Lots of rain but it didn't stop me from getting lots of good photos for future projects. However, time to get back to work on Mr. Disco. I usually start a figure somewhere in the center. Here I chose the lapel line. I do the first bead ladder only an inch or two at a time, shape it by adding a second row, then continue. If the original bead ladder is too long, it becomes difficult to properly shape it. I then decided to start a second piece working form the second lapel. I repeated the blue on blue striping of the Swing dancer's bodice in the leisure suit vest of the Disco dancer and joined the 2 pieces.

Arms and jacket were executed in a manner similar to that described for the Swing Dancers. I decided to start the hair as a bead ladder circle and add other circles of beads to provide a more hairlike texture. I am using #8 Fireline for my thread. It comes in crystal (white) and smoke (black). I do switch thread color--using the crystal for light beads and smoke for dark beads. Again, I find it easier to establish the outer edges of the figure and then fill in the center. I am constantly measuring the growing figure against the photo collage for shape, size and direction of lines. I do this as often as every bead and if a bead doesn't fit, I remove it before going on. It is very easy to get off pattern without this constant checking.